Here's what I did...
First you will need your 3 fat quarters, ruler, rotary cutter, Best Press and sewing supplies.
As always, press your fabric and square up your fat quarters. If you're not sure how to 'square up' see my past post here...
Once you have your fabric prepared, you're ready to place two fat quarter right sides together and mark off the front part of your 'bib'. For my toddler the width needed to be 6 inches for my 5 year old it was 8 1/2 inches. Be sure to measure your child to get an idea of width for the 'bib' area of the apron.
Next I marked my fabric for my cut lines for the 'bib'. Since I needed the bib to be approximately 6 inches wide, I measured 3 inches from the middle of the fabric. The best way is to fold your two fat quarters in half measure half the width you need from the fold and mark. On both children I discovered that whatever the width of the bib needed to be was about how far down the arm cutouts should be, so I measured 6 inches from the top of the fabric and then made an arch connecting the marks. I had to trace it in with my mouse since my pencil line was to light for the photo.
Then cut on your line to make the arm cut aways. Now from the cut aways you can make two double sided pockets. Like so..
Now that you have a cut square, sew your two pieces of fabric together making your pocket. Leave a whole in the bottom to flip out your pocket. Make two.
Next press and sew them to your apron fronts.
Set these aside for now and go on to make the ties for your apron. Out of your third fat quarter you will be cutting six 2 1/2 inch strips for the ties.
For two of the six strips you are going to press the strip in half, then press the sides into the center crease and then in half again. See photos...
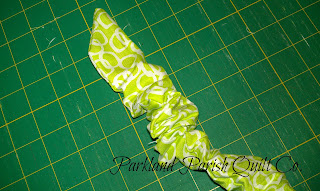
Now you're going to take these two strips to the machine and sew down a 1/4 inch seam to make the neck ties. Remember to fold one end in before you stitch so you have a finish end.With the other four strips you are going to sew them right sides together. I like to make the end a little nicer by making a point. For this I sewed a diagonal line from corner to edge of the strip and then cut off the corner. See photo...
Now press and sew a 1/4 inch seam around your ties to finish them up.
At last we are ready to put it all together!! Pin your ties to the appropriate places in between your two apron fronts. See photo...
Now your cutie patootie will have a cute little apron made by you! Get ready to have your little helper assist you with your holiday baking!!
Happy stitching and may your bobbins always be full!


No comments:
Post a Comment
We love to hear your comments! Thanks so much for stopping by!