Friday, September 28, 2012

Another Cobbler!

Now that autumn is here I just love warm, yummy desserts to accompany my tea. To get my last tastes of summer I had to make a peach and blue berry cobbler.  My only problem with that was that I had to share it with the rest of my household! Oh well, such is life!


Wrapping Up Summer Cobbler
4 or 5 medium, ripe peaches 1 cup of fresh blue berries
2 Tbsp quick cook tapioca 2 Tbsp sugar
2 tsp real vanilla 1 Tbsp melted butter


First bring a medium pot of water to a boil. Dip the ripe peaches in the hot water for a few seconds and then peel off the skin of the peaches. Then slice them into a bowl, removing the pit in the process. Then add the tapioca, vanilla and sugar to the fruit.


Once you gently mix the fruit and other ingredients. Place the fruit mixture into a greased baking dish. And drizzle with melted butter.


Next put together the topping.


Shortcake crust
1 1/2 cups of flour 2 tsp baking powder
1/4 cup packed brown sugar 1/4 cup melted butter (4 Tbsp)
1/2 cup heavy whipping cream

In a large bowl combine all the dry ingredients. Whisk them together to make sure they are evenly distributed. Then add the cream and butter. Mix with a wooden spoon until the dough comes together. It will be a stiffer dough. Don't over mix!

Spoon the dough on to the fruit. And then bake at 425 for 25 minutes or until golden brown.


When it comes out I let it cool for about 30 minutes, then I serve it with ice cream or just heavy cream. Yum!! Enjoy!

Wouldn't this just make a lovely end to a productive day of sewing! Hope so! Happy sewing and may your bobbins always be full!

Tuesday, September 25, 2012

Napkins...

Now that Autumn has officially begun, all my thoughts are on gifts. Family, friends, hostess gifts! I guess I'm just a giver and I love hospitality. People gathering together to share a meal and some time together. All excuses to decorate and embellish things around your home to make them more inviting.

I've been going through other blogs and magazine for new ideas of things to make to continue our theme of gifts for under $30. When you make it yourself it can be easily done and they can be so fun and personal!

A few posts back I gave you a tutorial for our 10 Minute Table Runner. I kind of got in a groove and got addicted to completed projects!! So when I made a 'runner' for my step-mom I had to make napkins to go with, so here's what I did.


For this project you will need:

  • sewing machine
  • rotary cutter and cutting mat
  • cotton thread (we used 50 wt)
  • straight pins (if you'd like)
  • 2 yrds of main fabric
  • 1/6 yrd coordinating fabric

1. Press

As always you need to press your fabric. Remember NOT to iron, as this can distort and stretch your fabric.

2. Square up

Remember to square up your fabric so your end product will lay nicely. If you're not sure how to do this see our later post. Click here...

3. Cut your fabric

I cut my main fabric to 12 1/4 x 15 1/2 and my coordinating fabric and bottom (main fabric) to 2 1/2 inch strips.

4. Sew

Next I sewed the strips and main fabric together with 1/4 seams and pressed. Then I sewed the pieced front to the back, right sides together leaving a small opening to turn out.


5. Turn out and poke out corners...

Next I turned out my napkin and used my 'Purple Thang', yes that's actually what it's called and poked out the corners. Then press.


6. Back to the machine...

Once you have your napkin pressed, then you need stitch the open closed and I top stitched around the napkin. Then you're done!!


Once you make one, you'll get them down and find your own style! They make a great gift and they're 'green' if you're into that too! Happy sewing and may your bobbins always be full!!


Sunday, September 23, 2012

Hexagons!

So have to caught the hexagon craze? It seems every where I look there are hexagons. We have a great new little kit in the shop that makes little mini hexagons and you can sew them into a wall hanging or other project.

The other night at show and tell Star gave us a little demonstration on making hexagons. They really do look easy and you can literally make anything out of them!! (see below)


So first you take the little hexagon cards and place them in the center of your fabric squares. For the tiny hexagons, those Moda Candies we have in the shop would be perfect. Then you just baste around the hex, nothing fancy, just large basting stitches.

 
Once you get it all basted you will have this.
 
 
Then lay out your hexagons to make your pattern and then begin stitching them together.
 
 
 Remove the papers/cards from the fabric and you're done! Cute, huh?
 
 
Remember how I said you can make anything with them. Look at this!!
 
 
AMAZING!!
 
Happy sewing and may your bobbins always be full!!


Wednesday, September 19, 2012

Creamy Coconut Pie!


I guess now that weather is changing I'm just in the baking mood and if you've been reading my posts you'll know my weakness is pie! So when I came across this recipe on Dough Puncher for a coconut cream pie in an 11 x 17 pan I was all over it!!

We've been making all kinds of berry and apple 'somethings' in my home lately, but I was just in the mood for a Coconut Cream!! I just love Coconut! So here we go...

First, as with any pie, you make the pie crust. However if you have 'crust phobia', you can always purchase a store bought crust, so don't let this step intimidate you from making this delectable creation! Since I made my dough, I added a little coconut extract to the crust to make it that much more 'coco nutty'. Is that a word?

Once you have your crust  already, you need to bake it off as this is a cream pie and the filling is not baked. Next we make your filling. The recipe called for whole milk, but I didn't have any on hand, so I substituted a combination of 2% and heavy cream. It worked just fine. Once you've made your custard and poured it in the crust, then you'll need to chill it before you put on the whipped cream.

**Just a note if you've not used corn starch before to thicken something. It seems like it takes forever, but then once the custard gets to a certain temp it thickens real fast. So be patient.


The final step is to just whip the cream and toast your coconut. I tweaked my version a bit from the original recipe. I added coconut extract to the cream instead of vanilla. Also, I bloomed some Knox Gelatin in my cream before I whipped it. This step prevents your cream from becoming "weepy" and it holds up better. So whip your cream, toast your coconut and you're good to go! Enjoy!

 
For the full recipe click here....

Just what you need after a long day of sewing! Happy sewing and may your bobins always be full!

Sunday, September 16, 2012

Twister Quilt Tutorial...

Hey, have you ever seen those cool 'Twister' quilts? I for one, am attracted to quilts that have stars or interesting block motifs. Here is an easy way get a complicated look with a really easy method. All you need are some charm squares and the 'twister' tool.
 
Here we go!
 
First you need to sew all your charm squares together in a patch work style. Once you get them sewn together, then we cut and the magic happens!

 
Now we start cutting. You have to have the interior border so that you have a seam to line up on and then we cut like so. Be sure to cut just the square so that you don't go into your next block. Can you see the + on the seam where the pink, green and yellow come together?


Once you get the squares cut then you connect them to make the twists.


I cut them and lay them out in strips so that I can be sure to press the correct way to have nesting seams. Then you will have perfect points. As you go you'll see the magic the farther you go.
 
 
Once you get you middle complete you can just add your borders and you're good to go. It's fairly quick, easy and looks amazing when you're done. If you need help with borders see my earlier  'Borders! Borders! Borders!' post.
 
 
So there you go! Give it a try! We carry both the 'lil twister' tool and 'big twister' tool!
 
Happy sewing and may your bobbins always be full!

Thursday, September 13, 2012

Reflections of the fair...

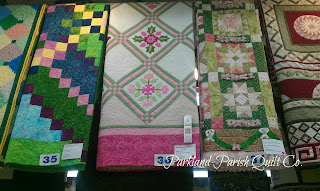
One of the things I love best about the end of summer is the fair. For years we were very active at the fair because my oldest was a member of 4H. You may think we had animals since we did 4H, however 4H has groups from all the various sciences. We took part in 4H Gardening for many years and then switched to mechanical engineering by participating in a Robotics 4H group. The fair is a fabulous way for all ages to show off their talents.

My favorite part of the fair are all the hand made exhibits. We always begin with the 4H projects and then work our way to the Open Classes. Here is just a sampling of some of our favorites!


If you haven't made it to the fair yet, I hope you make some time. It inspires me every year! Congrats to all the winners!!

Happy sewing and may your bobbins always be full!

Wednesday, September 12, 2012

Christmas Kits

Lately I've been thinking about gift giving and home decor. Spending time on Pintrest looking for new things to do. When we got in the new Christmas fabrics I was inspired. I just love paisley and can't stop looking at it! It's just gorgeous! Working is a quilt shop can be a dangerous place. I cut fabric and put kits together and I have to say, the more you play with a fabric you love the more you have to have it!!

This is a wonderful kit and would make a lovely gift, if you could part with it!

Kit includes all the fabrics and binding...
Pattern of the quilt...


So what are you working on for the holidays? Where do you get your inspiration? We love seeing all your creations, so bring them in or send us a photo to parklandparish@gmail.com we'd love to share them and celebrate with you in your accomplishment!

Remember to become a follower of our blog! We will be having upcoming give-aways and fun stuff and you won't want to miss out!

Happy sewing and may your bobbins always be full!

Tuesday, September 11, 2012

First Sunday Workshop...

Each month we have a fun workshop here at the Parish! It's our First Sunday Workshop. Each month folks come in to the classroom for a FREE class. The only cost is for the kit and each kit makes a cute wall hanging. Some ladies even get more than one done during the class time. Here are some photos of our last workshop!

The Ladies...

The Project...

Additional projects...


Didn't they turn out nice? Great job ladies!! So if you have a free first Sunday afternoon. Join us for a fun project and some wonderful fellowship here at the Parish!
 
Our next Workshop will be Sunday, October 7th. Call to reserve your spot today!
 
Happy sewing and may your bobbins always be full!

Sunday, September 9, 2012

Quick Gifts!

Now that fall is just around the corner and kids are back in school are your thoughts turning to the holidays? In our home fall means the beginning of birthday season and ends with the holidays, so I'm always in gift making mode this time of year.

I'm hoping to do some segments on 'Quick Gifts' and 'Gifts for $30 or Less' over the next few weeks as we all begin planning our gift giving and holiday decorating! So stay tuned for upcoming posts!

Today we are making our '10 Minute Table Runner'. This is a great gift for a friend or hostess! It's inexpensive and quick! What could be better? I made this one for a friend that loves Halloween. She goes all out and always vying to be the 'best' house so always give standard size candy bars, etc. She really gets in the holiday mood! I thought this candy and vintage fabric would be great for her candy table. So here we go!


10 Minute Table Runner

For this project you will need:

  • sewing machine
  • rotary cutter and cutting mat or scissors
  • cotton thread (we used 50 wt)
  • straight pins
  • Best Press (Mary Ellen's Starch Alternative)
  • 1/2 yard piece of fabric & 1/3 yard piece of fabric


Step 1. PRESS

The first thing you need to do with any project is to 'Best Press' and press your fabric. I'm using the word PRESS because you should do just that, press your fabric. If you iron your fabric, you're apt to stretch the fabric and you won't get a nice laying runner.

Step 2. Square Up

You want to make sure that your fabric is even. If you're not sure how to 'square up' see my past post on 'Pillowcases'. Then cut your fabric to size. The outer piece should measure 18 inches x wof and the inner piece should measure 11 inches x wof.


Step 3. Layout

Now that your fabric is nicely pressed and 'squared' you can lay out your pieces right sides together and pin the inner piece to the edge of your outer fabric.

Step 4. Sew

Now you will go to your machine and sew a 1/2" seam down the side of your runner. Press your seams away from the center and then pin the other side and sew again.


Step 5. Pull Out

Now that you have your back and center sewn together, you should now have a tube of fabric. Next you will pull your fabric 'right' side out and even up your borders and press.


Step 6. Making the Points

You are now coming into the home stretch! Next you're going to make the points to finish up your runner. Take the end of your tube trim it, if the ends aren't even. Then fold you runner in half and sew up the ends. Do this for each end. Then flip out the points, press and sew down the ends.


Step 8. Press and DONE!

After sewing down your edge of the "envelope" you can just press and rejoice in a COMPLETED project! Quick and makes a wonderful gift!!
 
 
Hope you enjoy your project! Happy sewing and may your bobbins always be full!