Showing posts with label Quilting. Show all posts

Friday, January 4, 2013

100 Yard Stash Dash...

It's a new year and new projects to work on. Or maybe it's a new year to tackle those UFO's!! Here at the Parish we are offering a new program to help you get those UFO's that are laying about your sewing room done! Let's all get reacquainted with our stash and get some projects done!

To that end I'm kicking off our 100 yard Stash Dash with a newly embroidered pillow! This year I have set a goal to learn a new skill and my first one is embroidery. Here's what I did...

I inherited this partially done with a quick lesson on the basics. I then finished the project and went through my stash an found a pillow form and fabric to make this pillow.


 To make this pillow I just bordered the embroidery fabric. If you're not sure how to add a border you can click here for my past post on borders.


Once I bordered my image I made a pocket in the back to create the sham.


I sewed everything right sides together and the turned it out.


Kicking Off the 100 yard Stash Dash Challenge!
How well do you know your stash?  How many unfinished projects do you have?  Well, if you are like most of us, you have way too many UFO’s and that stash is just begging to be put to use!  So we have just the best, most fun program to help you get through all those projects and into your stash:  The 100 Yard Stash Dash Challenge!  

Here is how it works:
Purpose:  To finish projects, use our stash and just have some good stitching fun!
The Dash officially begins February 3, 2013 and runs through December 31, 2013.
Register for the Dash January 1-28, 2013.  To participate you can either use 2 fat quarters from your stash and pay $3.75 or pay just $10 and we will purchase your fat quarters for you!  You then become a Stash Dasher and are eligible to play!

Rules:
1.       Fabric used must be part of your stash by January 28th (honor system here).
2.       You may purchase fabric for backgrounds, bindings, backings and borders - that will count too if purchased at The Parish Quilt Shoppe.
3.       All projects completed this year will count towards the 100 yards.  This includes table toppers, bags, wall hangings, and, of course, quilts.
4.       Projects must be completed – the goal is to use our stash and complete UFO’s – not make more UFO’s!!
5.       How to calculate how much fabric you used in your project? The easiest way is to take the width times the length and divide by 40 to get how many inches and then divide that by 36 to get your yardage.  If you use yardage from your stash for the backing, then you would double this amount for the project.  Don’t stress on this part – we will help you!
6.       If at the end of each month you're not able to finish a project from your stash. Your penalty will be one fat quarter for the kitty. You can bring it in or send it to the Parish.
7.       Quarterly winners!!  Each quarter we will draw a name from all our participants and they will win a prize in addition to being featured on our facebook page, or blog or blast so we can see what everyone is working on!
8.       As the 100 yards is completed, each participant will win a fat quarter bundle, beautifully coordinated and bundled from all entry the fat quarters!  What fun!
9.       Be on the watch throughout the year for Stash Dash Sew Days and specials for everyone participating and playing!

This will be sew much fun and inspiring – we will encourage each other with just a bit of competing! I am excited to see who can use 100 yards from their stash and complete those UFO’s this year.

May your bobbin always be full!

Friday, December 28, 2012

Happy New Year!

The New Year is literally around the corner and I am just looking back over the year in awe! I began this year with a new sewing machine and wanting to make "girly" clothes for my baby girl. I had no idea of the journey I was beginning.

In January I took my first class at Parkland Parish to make the "Pretty Ditty" Apron from Ann. I just wanted to get back into sewing again since it had been years since I had sewed anything. From there I was talked into doing Block of the Month and my journey had begun. I remember attending my first BOM class and thinking, "what on earth was I thinking?!" So I quickly enrolled in the first Parish Academy class, finished that class and enrolled in the second. By now my addiction was strongly taking hold!!

Through teaching from Ann, the help and support from Kathy and Tracey I can now call myself a quilter. I love this new hobby and the friends I have made over the past year. As I look to this new year before me I hope to learn more and pick up new skills and techniques. I plan to take on embroidery and applique and hope to share my journey here with you.

I would love it if you would comment and let me know what you would find helpful and what things you would like to see us do. With the help of Tracey, I hope to offer lots of projects, tutorials and maybe even a quilt along. Please feel free to share your projects, thoughts and suggestions with us!! You can comment here on the blog, Facebook or send us an email at parklandparish@gmail.com.

If you haven't "liked" us on Facebook, please do! We love to share your projects! They inspire all of us! We hope you had a wonderful Christmas and we wish you all the best in the new year! I hope you share 2013 with us...

Happy sewing and may your bobbins aways be full!!

The Christmas quilt I made for my church raffle.

Wednesday, October 31, 2012

Quilting and things...

So are you enjoying this rainy weather? It's been great for sewing, but it sure is getting busy around my house. I bet yours too! So I don't have a fun tutorial or anything for you today. Maybe Friday I'll have my act together!! As for now I'm just happy that we got the pumpkins carved, treat bags made, and all the other many projects we've had over the last few days.

Here's what's on my sewing table today...

 
I'm trying to get this baby quilt done for the weekend. Isn't it sweet? It's not the traditional 'pink and blue', however I love this French General fabric we have in the shop right now and I think it makes a lovely baby quilt.
 
As I was putting this together, I got thinking about the whole process of "quilting". Many of the ladies I know send their quilts out to be quilted. I love the look of quilts that have been 'long-arm' quilted, however for me it takes away from my creation. Don't get me wrong long-arm quilters are artists to themselves. The work they do is AMAZING. However, for me if I'm going to make something, I like the process from beginning to end. Some ladies are what I call 'piecers'. They love the process of piecing and putting the puzzle together. So I began thinking of what I am. I mean I've only been quilting since January of 2012!! So I am still a developing quilter. I think though I will stick with the whole process. For now I just 'stitch in the ditch' and am happy with that for now. Some day however, I'd love to try 'free motion' and learn other techniques.


For those of you that are newbie quilters like me, I thought I'd share my photos of what I do. The other day someone asked me what 'stitching in the ditch' was. Well, when we sew all those seams we are creating the ditch. This is where your pressing is important. If you are not careful with your pressing, when you get to your quilting it may be hard to stay "in the ditch". Also, when you line up your corners, it's much easier if they are closer to perfect than not.


I tend to sew all one way and then the other. Maybe a more experienced quilter would do it differently, but this has been working for me.
 
 
See how you can just follow the seam? And if you gently pull the fabric taught you can sew right in that 'ditch' and your stitching won't show. On the top at least.


I also try to pull my bobbin thread to the top. This way I have a clean beginning at the start of my stitching. Since I am a newbie and don't like my quilting to show. With this quilt I matched the thread to my backing. It blends right in.


So how about you, are you a 'piecer? Or a whole process quilter? What part(s) do you enjoy best? I'd love to hear your comments and any pointers you have for me! Happy stitching and may your bobbins always be full!!

Also, Happy Halloween!
 

Tuesday, October 23, 2012

Projects! Projects! Projects!

I have to say there are times during the build up to the holiday season that I begin to feel overwhelmed! So many things to finish and so little time! Everything looks wonderful in the shop and I get over confident about the amount of time I have, but then life happens and well, we just plain run out of time. So how can we overcome this feeling and get the job done? I have some suggestions...

  1. First, get organized! Prioritize those projects. What has to get done? What would be nice to get done? What can wait?
  2. Organize each project. I will be doing a tutorial later in the week using index cards to organize your projects so that you can have things at your finger tips when you're out and about and you need that last piece of fabric for a border, backing or binding.
  3. Take it one "block" at a time. Whether it's an actual 'block' or  you look at quilting as a "block of time" or binding as a "block of time". Schedule your "blocks" of time out. So each evening or whatever time you have you can work on and complete that task.
  4. Work with a friend. Come in to the Parish and sew with us. Use our design walls and tables to spread out your work, to get organized, get a second opinion or just get help!
  5. Take a class. If you're still looking for gift ideas, sign up for one of upcoming classes. In our "Turning Twenty" Quilt class you can get a whole quilt top done in three classes or in our Miranda Day Bag Class you go home with a finished project at the end of class! Check out our calendar here...
Hopefully these suggestions will get you going and help you to get the job done! Happy stitching and may your bobbins always be full!!

Thursday, September 13, 2012

Reflections of the fair...

One of the things I love best about the end of summer is the fair. For years we were very active at the fair because my oldest was a member of 4H. You may think we had animals since we did 4H, however 4H has groups from all the various sciences. We took part in 4H Gardening for many years and then switched to mechanical engineering by participating in a Robotics 4H group. The fair is a fabulous way for all ages to show off their talents.

My favorite part of the fair are all the hand made exhibits. We always begin with the 4H projects and then work our way to the Open Classes. Here is just a sampling of some of our favorites!


If you haven't made it to the fair yet, I hope you make some time. It inspires me every year! Congrats to all the winners!!

Happy sewing and may your bobbins always be full!

Sunday, September 9, 2012

Quick Gifts!

Now that fall is just around the corner and kids are back in school are your thoughts turning to the holidays? In our home fall means the beginning of birthday season and ends with the holidays, so I'm always in gift making mode this time of year.

I'm hoping to do some segments on 'Quick Gifts' and 'Gifts for $30 or Less' over the next few weeks as we all begin planning our gift giving and holiday decorating! So stay tuned for upcoming posts!

Today we are making our '10 Minute Table Runner'. This is a great gift for a friend or hostess! It's inexpensive and quick! What could be better? I made this one for a friend that loves Halloween. She goes all out and always vying to be the 'best' house so always give standard size candy bars, etc. She really gets in the holiday mood! I thought this candy and vintage fabric would be great for her candy table. So here we go!


10 Minute Table Runner

For this project you will need:

  • sewing machine
  • rotary cutter and cutting mat or scissors
  • cotton thread (we used 50 wt)
  • straight pins
  • Best Press (Mary Ellen's Starch Alternative)
  • 1/2 yard piece of fabric & 1/3 yard piece of fabric


Step 1. PRESS

The first thing you need to do with any project is to 'Best Press' and press your fabric. I'm using the word PRESS because you should do just that, press your fabric. If you iron your fabric, you're apt to stretch the fabric and you won't get a nice laying runner.

Step 2. Square Up

You want to make sure that your fabric is even. If you're not sure how to 'square up' see my past post on 'Pillowcases'. Then cut your fabric to size. The outer piece should measure 18 inches x wof and the inner piece should measure 11 inches x wof.


Step 3. Layout

Now that your fabric is nicely pressed and 'squared' you can lay out your pieces right sides together and pin the inner piece to the edge of your outer fabric.

Step 4. Sew

Now you will go to your machine and sew a 1/2" seam down the side of your runner. Press your seams away from the center and then pin the other side and sew again.


Step 5. Pull Out

Now that you have your back and center sewn together, you should now have a tube of fabric. Next you will pull your fabric 'right' side out and even up your borders and press.


Step 6. Making the Points

You are now coming into the home stretch! Next you're going to make the points to finish up your runner. Take the end of your tube trim it, if the ends aren't even. Then fold you runner in half and sew up the ends. Do this for each end. Then flip out the points, press and sew down the ends.


Step 8. Press and DONE!

After sewing down your edge of the "envelope" you can just press and rejoice in a COMPLETED project! Quick and makes a wonderful gift!!
 
 
Hope you enjoy your project! Happy sewing and may your bobbins always be full!


Friday, September 7, 2012

Block of the Month...

Did you know that quilters had a lingo? Well, they do. As a new quilter myself, it took a little while to learn all the terms. Ladies that have been quilting for a while, usually have a Block of the Month or BOM that participate in or other clubs that they are involved with.

When most of us hear the word club, there are many things that come to mind. In the world of quilting clubs are a bit different. Often times 'clubs' offer a class time during their meeting. I have to say when I began quilting, in January, YES last January! I jumped in with both feet. I signed up for both clubs and classes. I wanted to learn as much as possible! My addiction was forming and taking hold!

January's Block

The first thing I did was sign up for the BOM. I went to my first class and thought, 'Oh my, what have I gotten myself into?' I felt like I was in way over my head. So then I went back and signed up for a beginning quilting class through the Parish Academy Series. I learned so much in such a short time! Taking a  beginning class and signing up for a BOM or other club is a great way to build your skills fast.


February's Block

 
Back to BOM, Block of the Month is just that. You build a large quilt month by month. It's a great way to build a complicated quilt, especially when you're just learning, by just taking it one block at a time. By the time 12 months have past you have 12 completed blocks and then you can sew them together to finish it up. Clubs are a great way to get into quilting and makes it more affordable than trying to do everything at once.


This year's BOM fabric
Since we are now in September we are winding down the current BOM, however the new one will be announced in just a few short months. So if you've been wanting to learn to quilt and were overwhelmed by the task, take a beginning class and then sign up for a BOM! You'll be glad you did!


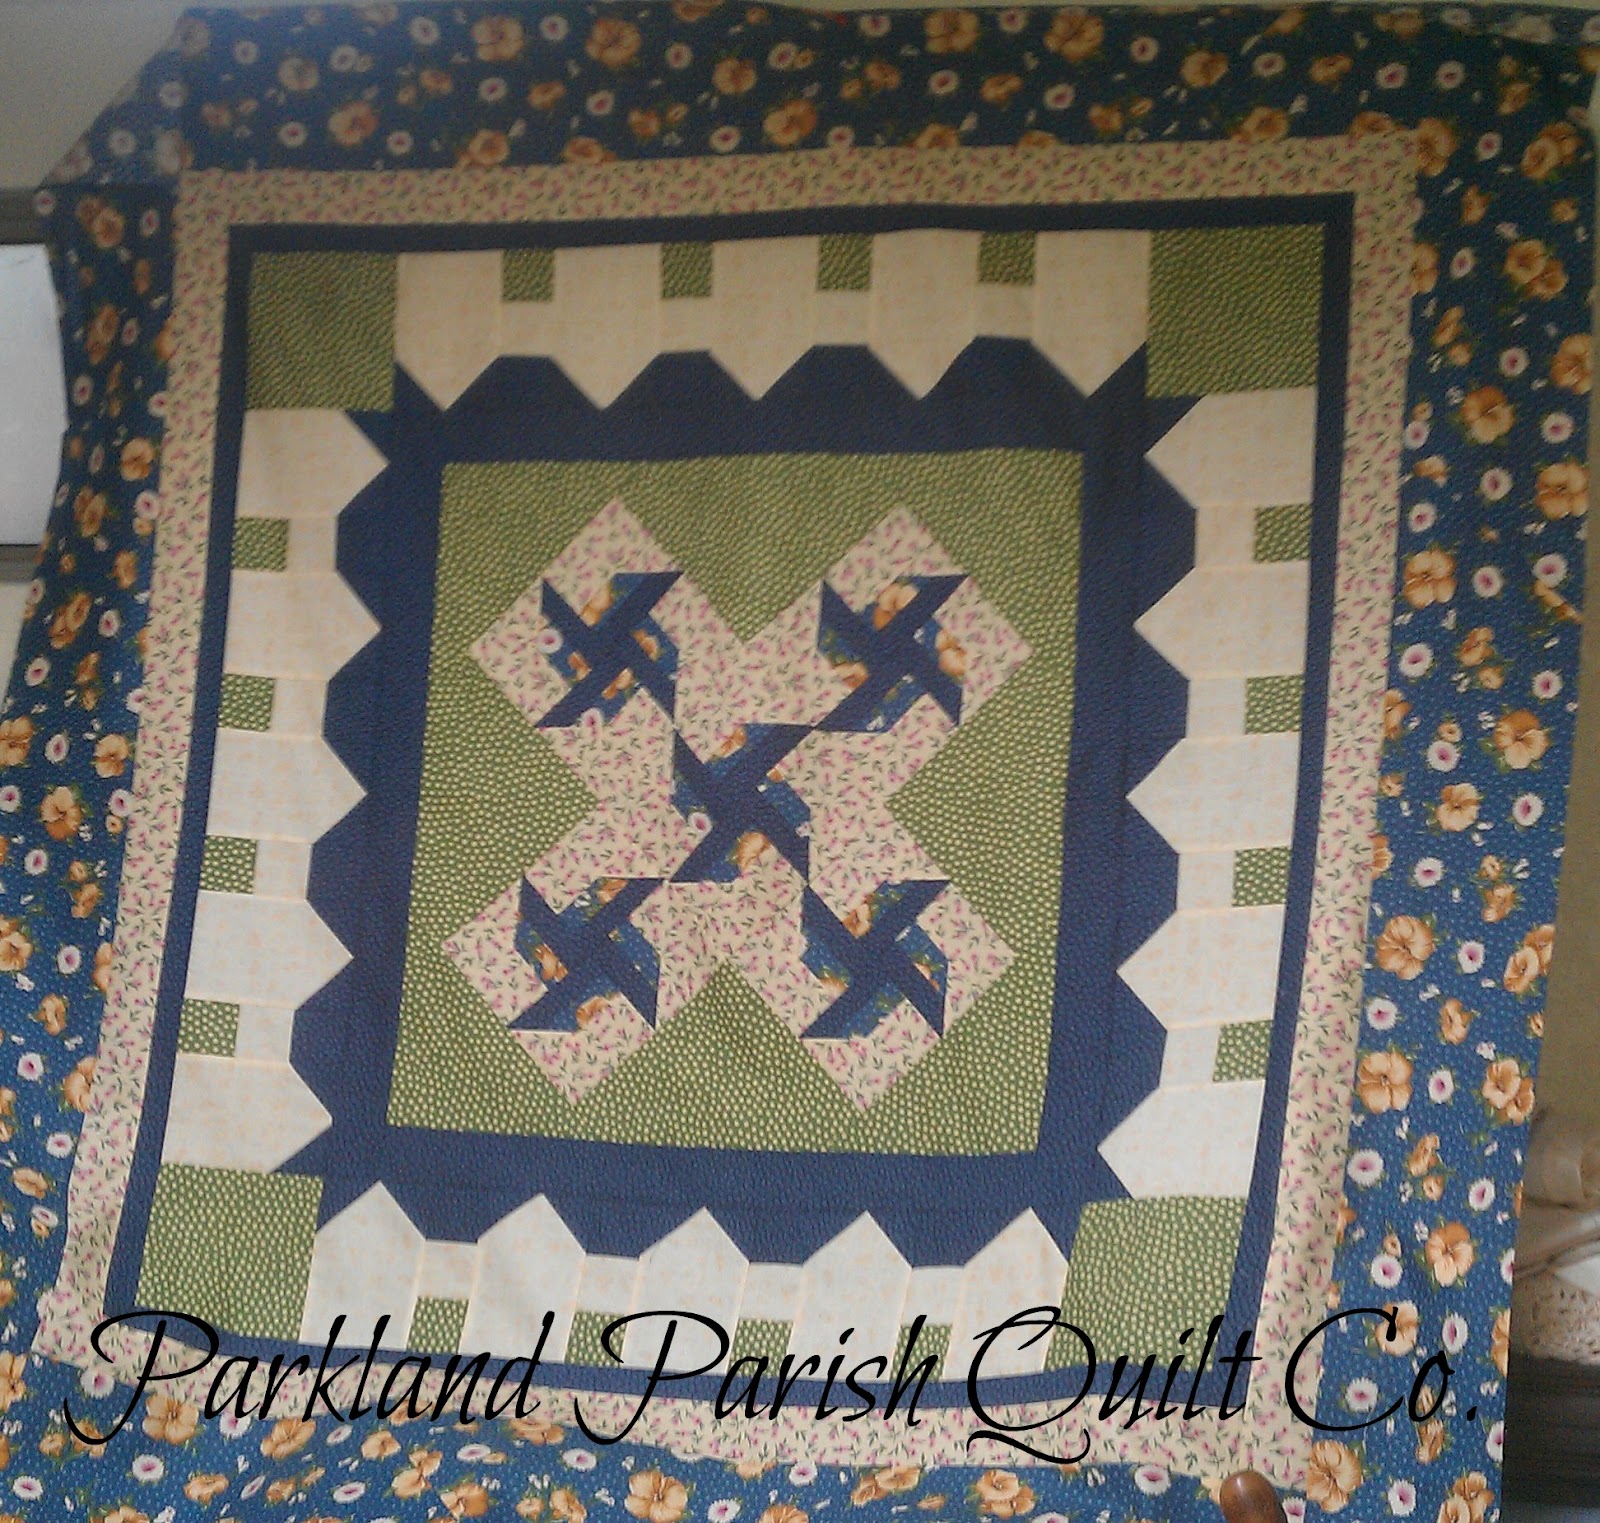
Now doesn't this finished quilt look intimidating? However, I've taken it just one block at a time and we are almost done! It's quite an amazing accomplishment for a 'newbie' quilter!! And you CAN do it too!
 
Have a wonderful day! Happy sewing and may your bobbins always be full!

Thursday, September 6, 2012

Featured Quilter!

Today we are featuring a young quilter named Brianna Heatherly. She may be young, but she has been quilting for 9 years! Brianna is a sophomore at Washington High School and is extremely active in raising money to find a cure for cancer! Brianna and her Nana are frequent patrons here at the Parish and we are proud to support them in their endeavors.

Each year Brianna raises approximately $1500 for the American Cancer Society 'Relay for Life' of Central Pierce with her quilt raffle. Brianna really enjoys choosing the fabrics and planning out her quilts each year.  This years quilt featured a Hummel theme with embroidered blocks. Quite a stunner!!

Here is Brianna and the current winner Erica Plank from Unseen Hands. 

In addition to making quilts Brianna also makes bags that she sells to raise money to purchase the fabric for her quilts. We carry them here at the Parish. If you'd like to support Brianna stop any time and check out her handy work. We also have them available in our online store. Click here to view them. Her bags sell for $50 and all proceeds are used to purchase fabric for her next quilt raffle!


We hope Brianna has inspired you as much as she has inspired us! 
Happy sewing and may your bobbins always be full!

Sunday, September 2, 2012

Fall Projects...

So what are you working on for fall? Are you working on table runners or toppers for your holiday table? Or maybe you're planning decorating for the kiddies for Halloween. Wouldn't this be a great project to do with the children in your life? I don't know about you, but my kids love to do projects. They are so proud when they can say they helped or better yet made it themselves. I think pillows and pillow cases are wonderful first projects for kids. They are fairly quick and easy, and I think this cute little Boo would make any kid smile!

If you come in to get the fabric for this project you get the pattern for FREE! We have lots of great Halloween fabrics to choose from! You can always check out our fabrics online as well and pattern offer still applies.

When I do dates with my kids, one of the things we like to do is head to the shop and get some sort of project to work on. The Halloween fabric is especially fun for them. If you've been following my posts you'll know we've doing all kinds of things around the house to get ready for fall. Over the last few days we've been collecting leaves and making leaf impressions. They are so fun. Now I think I have to find away to do them with paint or dye on fabric. We'll have to see what we come up with.

So what are you working on these days? You can always send us a photo. We are hoping to highlight projects in future posts. If you're interested in being featured leave us a comment!


Hope you are enjoying these last weeks of summer! Happy sewing and my your bobbins always be full!

Saturday, September 1, 2012

September is National Sewing Month!

We are kicking off National Sewing Month with our 9th Anniversary Sale! Join us on Sunday, September 2nd from 10am - 5pm for our Sale! We will have loads of goodies for all those holiday sewing projects!

 
Also, we are now carrying Moda's Sweet Treats in the shop. Over the next few weeks join Moda for their Designers Blog Hop! When you visit each blog you'll receive a project/pattern to use with your Moda Candy. So head over to the Parish and pick up your favorite treats and you'll be ready to create all the fun projects!


How will you celebrate National Sewing Month? Bring in your projects to the Parish so you may be featured in upcoming Blog posts! Remember to become a 'Follower' so you don't miss out on the fun! We will be having a give-a-way when we reach our 100th follower! Have a wonderful day and may your bobbins always be full!

Thursday, August 30, 2012

Inspiration...

As quilters we are attracted, well maybe that's not a strong enough word, addicted to fabric! We go into a fabric store and we begin drooling over all the lovely new fabric lines! Or maybe it's just me, but I don't think so! But where do you find your inspiration for your next project? Is it from the person your making your project for? A certain color or pattern of fabric? Where ever we get our inspiration from it seems that once you get into a project, it kind of takes on a life of it's own. I mean it's one thing when you choose a kited project, but when you get to choose the colors and values, it opens other possibilities.

I guess that's the thing that fascinates me about being a new quilter. I choose fabrics and I love them, but when they get placed around the quilt top the transformation is amazing. At times it's easy to get overwhelmed by the choices and the complexities of the quilt, but taking it one block at a time makes all the difference. Now that I have made some quilts I have a new appreciation for all the work, love, and sometimes frustration that goes into making it. I often times think others just have no idea!! They look in wonder, but they just 'don't get it'!

We've been doing a lot of fall themes around my house lately and the wonderful fall lines that have been in the store have really gotten my creative juices going! I just can't wait for the pumpkin patch trip and getting all my fall stuff out! I think any of these combos would make a great throw and/or table topper to compliment my decor!

We also have some new lovely fabrics in from a line called 'Little Black Dress' and boy could I go to town with that as well!

But right now I've got say the Halloween fabric has really caught my eye! Even though it's not my most favorite holiday. There are those in my life that just love it! And I have to admit I do like the 'nice' Halloween decorations. But I have a girl friend who just needs the table topper made with our new 'Cat, Bats, & Bones' fabric! So I'll probably have to make it for her!

Where do you get your inspiration? Drop us a comment and share. Don't forget to 'follow us' to get the most current blog posts. There's a rumor that when we hit our first 100 followers we'll be doing a give-a-way! So stay tuned!

Have a wonderful day! And may your bobbins always be full!

Wednesday, August 29, 2012

Borders! Borders! Borders!

Borders, they are one of those things that can add so much or take away from a quilt. They seem so easy and yet there is a trick to them. You might think you can just cut your fabric to appropriate width and length, then just sew it on, right? Not so fast! If you want a square quilt that lays nicely, you may not want to use that method.

Each time you add a new piece of fabric to your quilt, no matter whether it's your first block or the middle of your quilt, you need to treat it as adding fabric to another block. In essence your 'quilt middle' is just one large quilt block. So here are some tips on how to go about it.

1. Measure! Measure! Measure!
The first thing you need to do is measure your quilt. Be sure to measure the top, middle and bottom of your quilt on the longest side. If your quilt is a square, just choose a side. Which side isn't as important.


2. Take the Average...
Now that I have the three measurements take the average. So add them up and divide by three to get the average length of the one side of your quilt. Then you cut your strip the length of that average. For example, say your quilt measures 34 + 34.25 + 34.5 = 102.75. Then you divide 102.75 by 3 and get 34.25, that's what you would cut your border. 

3. Pin from the Middle...
Once you have your fabric cut to the proper length, place it on the side of your quilt you're adding to. Then  find the middle of the boarder and the middle of that side of your quilt. Begin pinning from the center out. You will repeat this process for each boarder you're adding. This will keep your quilt top nice and square, give your top a much nicer look, and make it much easier to quilt. Especially if you're sending it out to be quilted!


By doing this three step process, you'll ensure your borders are added while keeping your quilt as square as possible. Another benefit is your quilt won't be "doing the wave", as Annie says!


You can learn all these helpful tips and more by taking a Parish Academy Class. Stop by the shop or check us out online and see what's coming up!

Have a great day and may your bobbins always be full!

Monday, August 27, 2012

Holiday Projects...

Have you started your holiday sewing yet? In need of a new project for that special someone? We just got in this wonderful kit from Moda! I am so excited about it because it is gorgeous!! A small applique project and seems manageable for all skill levels. What I love about it is, since it is small you can get your feet wet with applique. If you haven't already. I just love the look of applique, don't you? The other great thing is, because it is small, it's portable. So you can do your stitching anywhere! If you're doing needle turn that is!

This table runner is so beautiful and since it's just a runner it should be a 'quicker' project. It would make a wonderful hostess gift for your host for the holidays or just for yourself! You could also give this cute little kit to your favorite quilter as well! The options are endless! I especially love the cute little bag it comes it. I just love little packages.

I enjoy having things to decorate my home that are for those in between times and I think this would make a perfect addition for in between Autumn and Christmas.

The kit includes the pattern and all the fabric for the quilt, applique and binding. So pop in the store for a visit   or check it out in our online store and get it coming right to your door!


Have a wonderful day and may your bobbins always be full!