Wednesday, October 10, 2012

Toothbrush Rug Class...

We offered a new class last night and we all had a load of fun! The Toothbrush Rug was a new technique to all of us. There are several ways of doing these kind of rugs and they are all wonderful! It was fun to sit and visit and work on this new project. It was very successful and hopefully we will be offering class one again soon. Here are photos of some of the fun! Watch for photos of the completed rugs, coming soon!


Doesn't it look fun?! Click here to view our full calendar for new offerings in the months to come!
Happy stitching and may your bobbins always be full!

Monday, October 8, 2012

Playing with ideas...

Hope you had a wonderful, sewing filled weekend! I've been tossing around an idea to create a Christmas Tree Quilt made out of 'twists'. The ones that you use the 'twister' tool to make. What gave me the idea was the pattern for the 'Twisted Heart' in the book 'Let's Twist Again'.

So I laid out all my squares and was excited at having it all come together.


After sewing all the squares and thinking that I had a good chance of achieving success, I began 'twisting'. Well, I'm not totally unhappy with what I created. However, it's not really a tree. So I guess I'll have to go back to the drawing board and try again.

 
Can you kind of see my tree, now that I've given you an out line?


Some folks use paint, some use clay, I guess I use fabric. It doesn't always turn out the way I see it. Sometimes it's better, sometimes it's worse, but all in all it's fun. Share with us what you've been working on. We'd love to see your photos and read any comments you'd like to share.

Hope you had a wonderful weekend of sewing and creating! Happy stitching and may your bobbins always be full!

Friday, October 5, 2012

Jelly Roll Quilt Tutorial...

Have you seen or heard of the 1600 Jelly Roll Quilt? Well, if you haven't or if you've heard of it but haven't given it a try, I'm here to tell you it's one the quickest quilts I've put together so far! I think that it only took, maybe two hours to have the top done, and that was with TONS of distractions!!

So find your favorite jelly roll and let's get sewing! Need a jelly roll? Click here and pick one up at our on-line store.

For this project you will need:

1 Jelly roll
sewing machine
cotton thread (we used 50wt)
rotary cutter and mat
marking utensil

8 1/2 x 16 quilting ruler
iron and ironing board

 First you'll need to unroll your fabric and mix it up. If you're a little OCD, which I think really we all are, get over it this quilt is supposed to be random! So mix up your fabrics and then choose your first two strips. You will be sewing these together at an angle like you would for binding.


So place your strips like so and then get your ruler. You need to place your ruler on the strips so that your 45 degree line is on the strip that is vertical. This will give you a line corner to corner to mark and sew on.


Once you have your ruler lined up, mark your line with a pencil and pin if you need to. Then take the strips to your machine and sew just a smidgen to the right of the line. Then cut your 1/4 inch seam.


Next you'll take these strips and press your seam open.


The quickest way I found to accomplish getting all these seams sewn and pressed was to lay out my strips in an 'L', two by two. Chain sew all the sets, then trim and press and then lay them out again until I had one long strip.


Now that you have one long strip, you cut off the first 18 inches and you just fold in half, right sides together and start sewing.


Once you get to the end, you trim off the fold and press.


Then go again and press. Repeat this process until you're done!


 Here's another one done by one of our customers in the Halloween fabrics!


So there it is! Easy as pie! Happy stitching and may your bobbins always be full!

Monday, October 1, 2012

Aprons!

Looking through gift ideas, I keep coming back to aprons. I love aprons, especially home-made aprons. The ones you find in stores just don't always give me what I'm looking for, so I'm always looking at apron patterns. Over the next few weeks for our feature of 'Gifts Under $30' I will be offering quick apron tutorials.

Just as an FYI of what's coming up. We will also be featuring designer Erica Plank of Unseen Hands. We will get to pick her brain and tour her studio! I can't wait!! I am also putting together a tutorial to make your own 'color catchers' so stay tuned. A great way to keep up with what we are doing is to become a 'Lovely Reader' over to the right! We will also be offering specials exclusively to our 'Readers' so you don't want to miss out!


Back to aprons... in the shop right now we have this adorable panel to make this quick apron. I took it one step further and backed mine and made the ties wider. I'm also thinking of just using this as a template to make others just the same. They are so quick and you can make them more appropriate for a female OR male, which is also a nice plus!


This panel also comes in this great fat quarter tower, so you could make other things to coordinate! Mug rugs come to mind or table toppers... just get creative!!


Hope this helps you to get your creative juices going!! Happy sewing and may your bobbins always be full!

Friday, September 28, 2012

Another Cobbler!

Now that autumn is here I just love warm, yummy desserts to accompany my tea. To get my last tastes of summer I had to make a peach and blue berry cobbler.  My only problem with that was that I had to share it with the rest of my household! Oh well, such is life!


Wrapping Up Summer Cobbler
4 or 5 medium, ripe peaches 1 cup of fresh blue berries
2 Tbsp quick cook tapioca 2 Tbsp sugar
2 tsp real vanilla 1 Tbsp melted butter


First bring a medium pot of water to a boil. Dip the ripe peaches in the hot water for a few seconds and then peel off the skin of the peaches. Then slice them into a bowl, removing the pit in the process. Then add the tapioca, vanilla and sugar to the fruit.


Once you gently mix the fruit and other ingredients. Place the fruit mixture into a greased baking dish. And drizzle with melted butter.


Next put together the topping.


Shortcake crust
1 1/2 cups of flour 2 tsp baking powder
1/4 cup packed brown sugar 1/4 cup melted butter (4 Tbsp)
1/2 cup heavy whipping cream

In a large bowl combine all the dry ingredients. Whisk them together to make sure they are evenly distributed. Then add the cream and butter. Mix with a wooden spoon until the dough comes together. It will be a stiffer dough. Don't over mix!

Spoon the dough on to the fruit. And then bake at 425 for 25 minutes or until golden brown.


When it comes out I let it cool for about 30 minutes, then I serve it with ice cream or just heavy cream. Yum!! Enjoy!

Wouldn't this just make a lovely end to a productive day of sewing! Hope so! Happy sewing and may your bobbins always be full!

Tuesday, September 25, 2012

Napkins...

Now that Autumn has officially begun, all my thoughts are on gifts. Family, friends, hostess gifts! I guess I'm just a giver and I love hospitality. People gathering together to share a meal and some time together. All excuses to decorate and embellish things around your home to make them more inviting.

I've been going through other blogs and magazine for new ideas of things to make to continue our theme of gifts for under $30. When you make it yourself it can be easily done and they can be so fun and personal!

A few posts back I gave you a tutorial for our 10 Minute Table Runner. I kind of got in a groove and got addicted to completed projects!! So when I made a 'runner' for my step-mom I had to make napkins to go with, so here's what I did.


For this project you will need:

  • sewing machine
  • rotary cutter and cutting mat
  • cotton thread (we used 50 wt)
  • straight pins (if you'd like)
  • 2 yrds of main fabric
  • 1/6 yrd coordinating fabric

1. Press

As always you need to press your fabric. Remember NOT to iron, as this can distort and stretch your fabric.

2. Square up

Remember to square up your fabric so your end product will lay nicely. If you're not sure how to do this see our later post. Click here...

3. Cut your fabric

I cut my main fabric to 12 1/4 x 15 1/2 and my coordinating fabric and bottom (main fabric) to 2 1/2 inch strips.

4. Sew

Next I sewed the strips and main fabric together with 1/4 seams and pressed. Then I sewed the pieced front to the back, right sides together leaving a small opening to turn out.


5. Turn out and poke out corners...

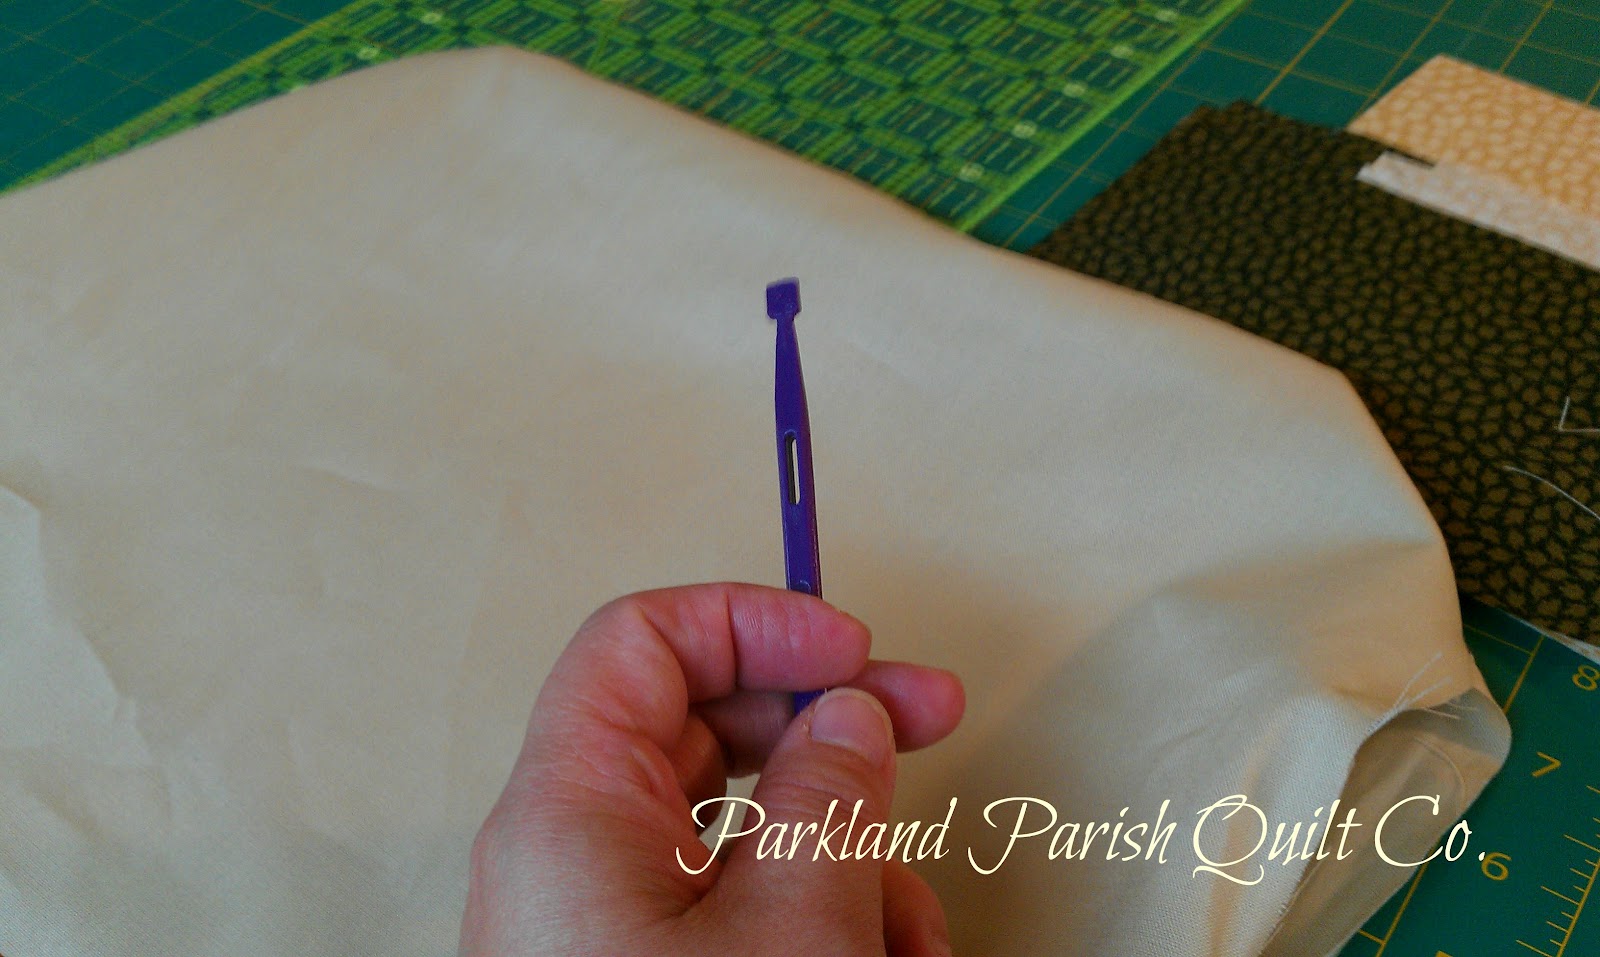
Next I turned out my napkin and used my 'Purple Thang', yes that's actually what it's called and poked out the corners. Then press.


6. Back to the machine...

Once you have your napkin pressed, then you need stitch the open closed and I top stitched around the napkin. Then you're done!!


Once you make one, you'll get them down and find your own style! They make a great gift and they're 'green' if you're into that too! Happy sewing and may your bobbins always be full!!


Sunday, September 23, 2012

Hexagons!

So have to caught the hexagon craze? It seems every where I look there are hexagons. We have a great new little kit in the shop that makes little mini hexagons and you can sew them into a wall hanging or other project.

The other night at show and tell Star gave us a little demonstration on making hexagons. They really do look easy and you can literally make anything out of them!! (see below)


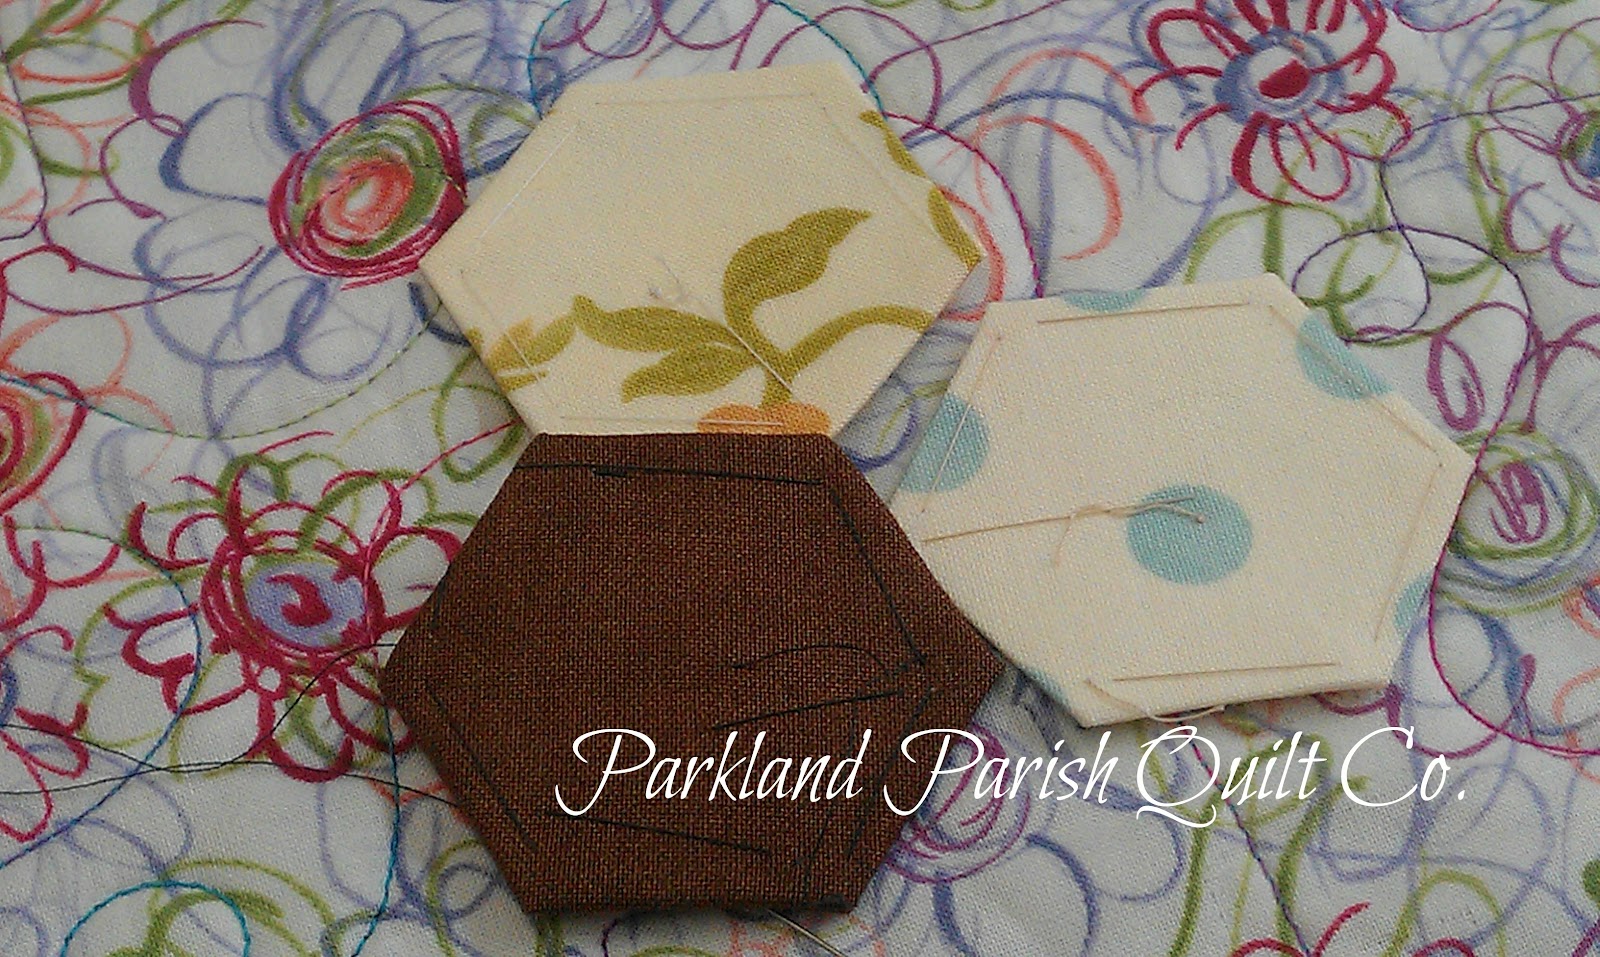
So first you take the little hexagon cards and place them in the center of your fabric squares. For the tiny hexagons, those Moda Candies we have in the shop would be perfect. Then you just baste around the hex, nothing fancy, just large basting stitches.

 
Once you get it all basted you will have this.
 
 
Then lay out your hexagons to make your pattern and then begin stitching them together.
 
 
 Remove the papers/cards from the fabric and you're done! Cute, huh?
 
 
Remember how I said you can make anything with them. Look at this!!
 
 
AMAZING!!
 
Happy sewing and may your bobbins always be full!!


Wednesday, September 19, 2012

Creamy Coconut Pie!


I guess now that weather is changing I'm just in the baking mood and if you've been reading my posts you'll know my weakness is pie! So when I came across this recipe on Dough Puncher for a coconut cream pie in an 11 x 17 pan I was all over it!!

We've been making all kinds of berry and apple 'somethings' in my home lately, but I was just in the mood for a Coconut Cream!! I just love Coconut! So here we go...

First, as with any pie, you make the pie crust. However if you have 'crust phobia', you can always purchase a store bought crust, so don't let this step intimidate you from making this delectable creation! Since I made my dough, I added a little coconut extract to the crust to make it that much more 'coco nutty'. Is that a word?

Once you have your crust  already, you need to bake it off as this is a cream pie and the filling is not baked. Next we make your filling. The recipe called for whole milk, but I didn't have any on hand, so I substituted a combination of 2% and heavy cream. It worked just fine. Once you've made your custard and poured it in the crust, then you'll need to chill it before you put on the whipped cream.

**Just a note if you've not used corn starch before to thicken something. It seems like it takes forever, but then once the custard gets to a certain temp it thickens real fast. So be patient.


The final step is to just whip the cream and toast your coconut. I tweaked my version a bit from the original recipe. I added coconut extract to the cream instead of vanilla. Also, I bloomed some Knox Gelatin in my cream before I whipped it. This step prevents your cream from becoming "weepy" and it holds up better. So whip your cream, toast your coconut and you're good to go! Enjoy!

 
For the full recipe click here....

Just what you need after a long day of sewing! Happy sewing and may your bobins always be full!

Sunday, September 16, 2012

Twister Quilt Tutorial...

Hey, have you ever seen those cool 'Twister' quilts? I for one, am attracted to quilts that have stars or interesting block motifs. Here is an easy way get a complicated look with a really easy method. All you need are some charm squares and the 'twister' tool.
 
Here we go!
 
First you need to sew all your charm squares together in a patch work style. Once you get them sewn together, then we cut and the magic happens!

 
Now we start cutting. You have to have the interior border so that you have a seam to line up on and then we cut like so. Be sure to cut just the square so that you don't go into your next block. Can you see the + on the seam where the pink, green and yellow come together?


Once you get the squares cut then you connect them to make the twists.


I cut them and lay them out in strips so that I can be sure to press the correct way to have nesting seams. Then you will have perfect points. As you go you'll see the magic the farther you go.
 
 
Once you get you middle complete you can just add your borders and you're good to go. It's fairly quick, easy and looks amazing when you're done. If you need help with borders see my earlier  'Borders! Borders! Borders!' post.
 
 
So there you go! Give it a try! We carry both the 'lil twister' tool and 'big twister' tool!
 
Happy sewing and may your bobbins always be full!